|
|
|
|
|
|
| Notices |
ATTENTION NEW REGISTRANTS!!!Read THIS before registering! -------------------------------------
HAVEN'T BEEN HERE IN A WHILE?
Please check your email address and make sure it is up-to-date.
If you are on this list, you need to update. OR if you know someone on this list, please contact them and have them update.
THE LIST
Upon updating, please contact an Admin so we can remove you from the list.
Thanks.
|
On The Horizon Working on something? With a 2D or 3D app? Is it SF - Fantasy - Real world? Let's see it!
To post art for Battlestar Galactica, go to our sister site- Colonial Fleets |
|
|
|
 |
|
 |
|
 |
|
 |
|
 |
|
 April 2nd, 2005, 06:20 PM
|
#1
|
|
Guest
|
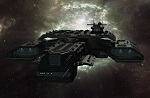
 Miranda class starship
It’s been a long time since I started a wip thread in this forum, and so many of the names and faces have changed! But I’ve been lurking around every once in awhile and am always impressed by the amazing talent that has thrived here over the past couple of years. I’ve been busy with other projects (and life in general!) but I’ve been feeling the urge to make another starship. Well, the itch has become unbearable and its time to scratch it. As some of you may already know, I made a Constitution class refit model a couple of years ago using 3ds max that worked out rather well. And I’ve always been a fan of the movie era designs, so in line with this, I have chosen the Miranda class (USS Reliant) from Star Trek II: The Wrath of Kahn as my subject. It hasn't been modeled much that I’m aware of, and I think I'll be able to do her justice.
My weapon of choice will be Maya 6 for this project and I've decided to create this model using NURBS. A lot of people shy away from NURBS modeling which is too bad because they are indeed quite powerful. But they are time-consuming and sometimes a pain to work with. Also their slower to render and harder to texture, so there’s a lot of good arguments for modeling straight to polygons. However, I want the scalability and precision which NURBS offers which is why I will not use box modeling or subd's. So when I'm done I can tessellate the model to a LOD that I require which will be more flexible in the long run.
My intention here is NOT to make this a tutorial, but rather just to show my thought processes and illustrate the various ways parts can be constructed. A lot of folks like to model by perfecting each component one at a time before moving on to the next component. I don’t work like that, as I find that you can paint your way into a corner that way. My work flow is similar to how you would sculpt in real life. Rough it out, examine, refine, and repeat as needed. 
So anyways, let’s get started and have some fun!
Jason
PS There’s lots of screencaps of the Miranda Class (USS Reliant) over at trek5.com:
http://www.trek5.com./caps/films/02_khan/index.html |
|
|

|
|
|
April 2nd, 2005, 06:21 PM
|
#2
|
|
Guest
|
I’ve collected gobs of screen caps from the movie, and from a few TNG episodes. I also came across some photos of the original prop when it was the Saratoga in DS9, and the Brittain/Lantree in TNG. These will be my primary reference.
I’ve been utterly disappointed at the lack of accurate, quality blueprints for this model. Honestly I would have expected something decent (like the pocketbook prints for the connie refit) by now, but sadly there seems to only be several iterations of two main sources of blue prints. The first source is the set of prints made by John Nielsen in 1983. These are ok but talk about way over simplified. There are serious proportionality problems, many of the parts appear to be copied from the pocketbook connie prints, and other parts are just plain wrong. However it does have a few correct aspects to it that are kinda useful (lie the tilt of the nacelle pylons) so they’re not a total waste. (I picked up a set on e-bay a while back). Fun for collecting but I won’t be using these much.
The second set is the ones made by Michael Ruppert over at Federation Frontiers. His are much better, but they too have some serious deviations. Well he actually mentions that his prints are not supposed to be the ‘Reliant’, but rather are a ‘reliant-like’ version so I guess we can’t hold him to that  Overall they’re better, so I’ll use these to get started, and to rough things out. However, I will stop using them as reference pretty early on and rely almost entirely on either prop photos or movie/tv screencaps.
(note to general public, if you have any decent photos or screencaps you’d be willing to share, I’d be very grateful! Pleae post or pm me)
Ok enough talk, I got my image planes setup in Maya and created some base layers to get the scene basically setup. I’ll start with the bridge tomorrow.
 |
|
|
|
|
|
April 3rd, 2005, 05:34 PM
|
#3
|
|
Guest
|
I made the rough-out of the bridge this afternoon. I'm leaving it pretty simple for now, since I ultimately want to flesh out the entire model to establish proper proportionality before I concern myself with detailing. Essentially I birailed the side walls and used some planar trims for the top and rear. And the bridge dome, of course, is a revolution. Pretty straight forward really.
I can see already that the blueprints are leading me astray. When followed exactly, it leaves you with connie style bridge so I've already taken the liberty of tweaking it to make it more Miranda like. I think it still needs some more shape correction, but I'll fix it up more later on. for now this is good enough.
Here's the wire lay out:

Which resulted in your typical bridge:
 |
|
|
|
|
|
April 4th, 2005, 05:31 AM
|
#5
|
|
Flight Instructor
Join Date: Nov 2000
Location: NY, NY
Posts: 2,216
|
Are you going to model the whole thing in NURBS? That should be fun.
|

|
|
|
|
April 4th, 2005, 05:51 AM
|
#6
|
|
TOS Gladiator Manager
Join Date: Nov 1999
Location: Seattle, WA
Posts: 2,069
|
Nice start. Look forward to the show.
__________________
3d Gladiators division
"That which does not kill me simply postpones the inevitable"
My Site
My Blog
|
|
|
|
|
|
April 4th, 2005, 07:57 PM
|
#7
|
|
Guest
|
better get your popcorn in the microwave tom..
I got the basic 'secondary' hull fleshed in tonight. As usual the saucer is a revolve. The seconday hull side walls are again birailed and the upper and lower surfaces are planar trims for now. I'll convert them to regular patches later. I maintained tangency at the connection on the side (between the saucer and secondary hull) by using a curve derived from the saucer instead of picking my own point.
I can see more problems with these blueprints now. The back end is too wide, and too long. Plus the saucer rim is too thick underneigth (radially at the edge) and the profile for the underside is too much like the connie. Again way too many connie elements.
Here's the latest pics. Well more work days ahead so progress will slow down through the week..


 |
|
|
|
|
|
April 5th, 2005, 05:26 AM
|
#8
|
|
Flight Instructor
Join Date: Nov 2000
Location: NY, NY
Posts: 2,216
|
Wow, lots of progress in just one day. Does the "secondary" hull portion really extend that far aft?
|
|
|
|
|
|
April 5th, 2005, 06:28 AM
|
#9
|
|
Guest
|
honestly i don't think it does. Most of the pics I've been looking at show it tighter. But this is what Michael Rupperts blueprints show, which I'm using to flesh out the whole model. I'll definitely remake this part later since it clearly is a bit off. Once I get crude stand ins for all of the parts, I can better evaluate the proportional relationship of things.
|
|
|
|
|
|
April 7th, 2005, 12:42 PM
|
#10
|
|
Guest
|
|
|
|
|
|
|
April 7th, 2005, 02:30 PM
|
#11
|
|
TOS Gladiator Manager
Join Date: Nov 1999
Location: Seattle, WA
Posts: 2,069
|
Lot of work in a short time. Looks great!
__________________
3d Gladiators division
"That which does not kill me simply postpones the inevitable"
My Site
My Blog
|
|
|
|
|
|
April 8th, 2005, 06:06 AM
|
#12
|
|
Flight Instructor
Join Date: Nov 2000
Location: NY, NY
Posts: 2,216
|
It's coming along nicely.
|
|
|
|
|
|
April 10th, 2005, 01:04 PM
|
#13
|
|
Guest
|
Hi jason, I have seen some of your other work and am a big fan. Your stuff is always so smooth, the benefit of being good with spline modelling I guess.
As a self taught noob, and not very good, I always try to pick the brains of you guys. May I ask you a favor? Can you post the spline cages etc of how you created the body of the ship? I tried to make a miranda class some time ago and had no luck at all.
Any advice would be great, Thank you,
Richard Hufnagel
|
|
|
|
|
|
April 10th, 2005, 08:17 PM
|
#14
|
|
Guest
|
I've finished the warp nacelles this weekend, I'm pretty happy with how they turned out. I think I've captured almost all of the unique differences of the Miranda class nacelle, as compared to the Constitution refit. All of the major surfaces have been filleted, but I left a few sharp edges in there for contrast. I think they really add to the realism of the surfaces. And I've also learned a couple of workflow enhancements that has enabled me to figure out how to eliminate trims - albeit a very painful and tedious process. Anyways, these are about 97% trim-free. I rebuilt almost every surface to be a non-trimmed NURBS patch. Its been a grueling three days but well worth the effort.
I stil have a few widgets to add, but I'll get to them later. So here's some rendered pics of the nacelle.

and the front and rear.
 |
|
|
|
|
|
April 11th, 2005, 05:18 AM
|
#15
|
|
TOS Gladiator Manager
Join Date: Nov 1999
Location: Seattle, WA
Posts: 2,069
|
Wow! The hard edges do work well, as contrast, to the overall look. Super work.
__________________
3d Gladiators division
"That which does not kill me simply postpones the inevitable"
My Site
My Blog
|
|
|
|
|
|
April 12th, 2005, 04:20 PM
|
#16
|
|
Guest
|
Thanks Tom. hey whats going on with colonial fleets these days?
A small update, I made the sensor doodads that are on either side of the primary hull saucer. I started with a loft with a side trim to gut the opening out. Then I broke down the outer surfaces and rebuilt them into unique nurbs patches. The inner walls are offset surfaces. The I birailed the surfaces to connect the outer and inner skins,. And the spherical thingy is just a revolve.
 |
|
|
|
|
|
April 12th, 2005, 04:39 PM
|
#17
|
|
Starships are my hobby!
Join Date: Nov 2000
Location: São Paulo - SP - Brasil
Posts: 301
|
Another Miranda ! Good !
If you are looking for refs, take a look in the Alain´s wip at www.lwg3d.org. An acurate model, with great close-ups. |
|
|
|
|
|
April 12th, 2005, 04:49 PM
|
#18
|
|
Guest
|
Yes I was just made ware of al3d's model - its very nice. But I'm wary of using other peoples models as reference.
I'm mainly running off of the pics of the prop from Trek Mechanics 4 (you can see crappy small scans here. I managed to buy a copy of the book a few months back. Its loaded with great model shots of a bunch of different trek ships). I'm also using a gob of screencaps which have proven invaluable. |
|
|
|
|
|
April 15th, 2005, 06:07 AM
|
#19
|
|
Guest
|
I made some decent headway on the nav dome below the saucer these last few days. I want to finish it this weekend and get a good start on the photon torpedo launcher.
 |
|
|
|
|
|
April 17th, 2005, 09:03 AM
|
#20
|
|
Guest
|
I finshed up the nav dome and am moving on to other parts. This still needs some widgets inside each port, but I'll get to those later, I mainly wanted to finalize the outer shape. Compared to the connie, this one has that 'mean' look to it no wonder I suppose since it was the ship of the bad guy.
 |
|
|
|
|
|
April 19th, 2005, 02:02 PM
|
#21
|
|
Guest
|
I've made good headway on the Photorp launcher since the weekend, basically refined the shape to my liking, did the cutouts, and made the nozzles. Those nozzles were a serious pain, and I'm glad that parts over. I'm getting a start on the rollbar now, just working on the connection between it and those phasor cannons (im not using subd's anywhere on this model, pure nurbs).
Here's some progress pics at the moment..

and rendered..
 |
|
|
|
|
|
April 20th, 2005, 07:18 AM
|
#22
|
|
Flight Instructor
Join Date: Nov 2000
Location: NY, NY
Posts: 2,216
|
Spectacular!
|
|
|
|
|
|
April 24th, 2005, 08:24 AM
|
#23
|
|
Guest
|
I haven't gotten as much done this week, things have been going a bit slow. At any rate, I've pretty much gotten to what I'll be using as the rollbar that holds the weapons pod above the ship. I'm putting off doing all the widgets on the side until later, maybe next weekend. Probably next I'll start fleshing out the primary hull.
 |
|
|
|
|
|
April 25th, 2005, 05:26 AM
|
#24
|
|
TOS Gladiator Manager
Join Date: Nov 1999
Location: Seattle, WA
Posts: 2,069
|
Very nice indeed!
__________________
3d Gladiators division
"That which does not kill me simply postpones the inevitable"
My Site
My Blog
|
|
|
|
|
|
April 25th, 2005, 11:08 AM
|
#25
|
|
Treybor
Join Date: Oct 2001
Location: San Diego, California
Posts: 518
|
Great stuff Jason! Alain over at LWG just got done with his version of this vessel. This one looks to be almost as detailed as his. Good Job!
|
|
|
|
|
|
April 26th, 2005, 07:51 PM
|
#26
|
|
Guest
|
thanks Sean
Well I decided to work on the widgets after all, so I'm making this a widget marathon week. I've pretty much made my best estimation of what the rollbar phasor widgets look like, and I'm moving on to the photorp launcher next. This has been a bit tough, and I've heavily depended on the Trek Mechanics mag ( link see Brittain pics) for the details of these. Even with the full size images its hard to make out exactly whats there. This isn't totally perfect, but its pretty close and should do the trick.
 |
|
|
|
|
|
April 27th, 2005, 01:08 AM
|
#27
|
|
Guest
|
Your work is always really nice to look at |
|
|
|
|
|
April 27th, 2005, 07:08 AM
|
#28
|
|
Guest
|
thanks Tom! hey I like the new look of colonial fleets.. (i'm a lurker there)
|
|
|
|
|
|
April 27th, 2005, 09:15 AM
|
#29
|
|
Flight Instructor
Join Date: Nov 2000
Location: NY, NY
Posts: 2,216
|
The widgets look great to me.
|
|
|
|
|
|
April 27th, 2005, 10:04 AM
|
#30
|
|
Treybor
Join Date: Oct 2001
Location: San Diego, California
Posts: 518
|
I second that! Great work! Are you using Lightwave or Max
|
|
|
|
|
|
|
 Posting Rules
|
You may not post new threads
You may not post replies
You may not post attachments
You may not edit your posts
HTML code is Off
|
|
|
|
|
|
|
|
|

 For Fans Of CGI/Digital Art
|
|
|