|
 |
|
 |
 |
|
This set of tutorials is designed
to help you create better
looking, more realistic space
scenes in your 3D animation
package.
Please note that some of these
lessons contain a lot of
images and may take some time
to download over slower connections.
|
|
|
|
Building
a Better Starfield (Part 1)
Author: Kier Darby
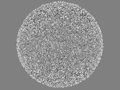
This first part of the Better Space tutorial
will show you how to build a decent starfield
to put in your scenes. First, we create
the geometry.
|
|
|
Building
a Better Starfield (Part 2)
Author: Kier
Darby
Next, we set up surface properties for
the stars, and then set them up for rendering.
|
| |
|
|
|
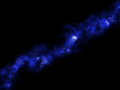
Building
a Better Nebula (Part 1)
Author: Kier Darby
In this lesson, we will build the geometry
and set up the surfaces for a nebula.
|
|
|
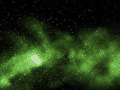
Building
a Better Nebula (Part 2)
Author: Kier
Darby
Next comes the most important part of the
nebula creation process: painting the
nebula image map.
|
|
|
Building
a Better Nebula (Part 3)
Author: Kier
Darby
To conclude our nebula-building section,
we will put the nebula together with our
stars, and then look at some ways to affect
the look of our nebula at render-time.
|
| |
|
|
|
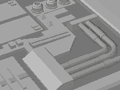
Adding
Mesh Detail (Part 1)
Author: Kier
Darby
In this lesson, we will look at enhancing
your spaceship / space station models
with actual detail on the mesh, rather
than texture.
|
|
|
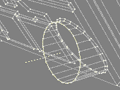
Adding
Mesh Detail (Part 2)
Author: Kier
Darby
Having added detail to flat surfaces that
are perpendicular to cardinal axes in
the previous lesson, this next lesson
will show you how to add detail to flat
surfaces at an arbitrary angle to perpendicular
axes.
|
|
|
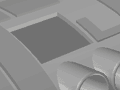
Adding
Mesh Detail (Part 3)
Author: Kier
Darby
Finally, we will add detail to a curved
surface.
|
| |
|
|
|
Modelling
Image Maps
Author: Kier
Darby
In this lesson we will look at a technique
for modelling image maps for use
as diffuse, specular and bump maps.
|
|
|
Painting
Custom Image Maps
Author: Kier
Darby
The best looking maps are always those
that are painted specifically for the
model to which they are applied. This
lesson shows you how to get started.
|
|
|
Dirtying-Up
and Adding Battle Damage
Author: Kier
Darby
An extra level of authenticity can always
be lent to your ships and stations if
they have a certain feel of having been
used. This lesson goes through
some techniques that will help you achieve
this look.
|
| |
|
|
|
Lighting
Tech-Based Spaceships
Author: Kier
Darby
The element of the scene that is most commonly
done badly is the lighting. This lesson
aims to help you to improve your lighting
techniques, with the end result that your
scenes look better. We begin by looking
at how to light tech-based ships.
|
|
|
Lighting
Organic-based ships
Author: Kier
Darby
Having dealt with tech-based ships, we
take a brief look at the slightly different
requirements of lighting organic, curvy
ships.
|
| |
|
|
|
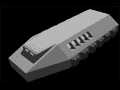
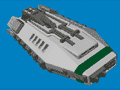
Beginners'
Ship-Building Tutorial (part 1)
Author: Alexander
Shareef
The following series of three lessons written
by Alexander Shareef take the beginner
modeler through the steps necessary to
build and texture an Earth Alliance Shuttle
from Babylon 5.
|
|
|
Beginners'
Ship-Building Tutorial (part 2)
Author: Alexander
Shareef
With the basic hull in place, the tutorial
moves on to create some surface details
and nurnies.
|
|
|
Beginners'
Ship-Building Tutorial (part 3)
Author: Alexander
Shareef
Modelling complete, we texture the ship
and set it up in Layout ready for animation.
|
| |
|
|
|
Creating
Inset Windows on Ships
Author: Fabio
Passaro
This tutorial written by Fabio Passaro
takes you step-by-step through the process
necessary to create inset windows, such
as those that adorn Star Trek ship hulls.
|
|
|
Pipes
and Organic Objects: Rail-Extrude
Author: Fabio
Passaro
Rarely used and often misunderstood, Fabio
takes you though some of the functions
that are made easier through the use of
the Rail Extrude tool.
|
|
|
Uses
for the Lathe Tool
Author: Fabio
Passaro
The lathe tool can be used for all sorts
of purposes, not just creating wine glasses!
Fabio shows you how to build the
basis of a Vree saucer, and demonstrates
how to build a spring with the lathe.
|
|
|
|
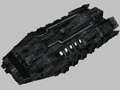
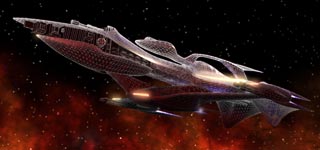
Build
Your Own Whitestar
Author: Kier
Darby
This huge tutorial aims to guide the user
through the process of modelling the Whitestar
from Babylon 5 using Lightwave's spline
modelling tools. Start with a squiggle,
and end up with a Whitestar! This tutorial
also contains information on texturing
the ship.
|
|
If you have a small display, and you would like to
view these tutorials outside of the ap3d.com
frameset, click
here.
I will continue to add lessons to this tutorial series
as and when they are completed... right now I am writing
a compositing tutorial for you... If you have any
comments, questions or suggestions regarding these
tutorials, please use the feedback
forum at the bottom of each lesson page.
Some of the techniques described here may be familiar
to old hands at creating CG space scenes, some may
not. My goal is to bring a whole body of knowledge
together in order that by the end of these lessons,
your space scenes look better than they did before.
I will be writing this tutorial using Lightwave 3D
as my animation software and Adobe Photoshop as my
image editor, but the techniques described will translate
well into almost any software you choose to use.
I am currently using Lightwave [6], and most screengrabs
will show this, but if the procedure required for
a particular step between Lightwave [6] and older
versions is very different I will post two different
sets of instructions. Fairly often you will see something
like this:
 |
Lightwave [6]
|
|
 |
Lightwave 5.6
|
|
|
Do something...
|
Do something else...
|
Simply follow the steps appropriate to your own version,
Lightwave [6] on the left and Lightwave 5.6 / Inspire
on the right.
Special thanks to my beta-buddies; those people
who have been following these tutorials as they were
written, pointing out errors and wording that makes
no sense... Fabio, CAClark, Drakh, Boxy: Thanks.
|